In this short article, we will cover how to install an SSL Certificate on SiteCountry Cloud Hosting.
What is an SSL Certificate?
SSL (Secure Sockets Layer) certificates are a small piece of digital signature used to link a dedicated organization called an SSL Vendor or a CA (Certificate Authority) to an online business via a cryptographic key pair. This bond ensures encryption of data passed from the server where the website resides and the browser of the visitor.
Google has also indicated that having an SSL certificate is definitely a ranking factor.
How to check if I have an SSL Certificate?
In many cases, your site might already have an SSL certificate automatically installed by SiteCountry as we provide 100% free SSL Certificates to all your domains, subdomains, addon domains and parked domains automatically with our affordable and fast cloud hosting packages.
To check if you already have an SSL certificate, simply visit the site via HTTPS for example, if your site is www.exampledomain.com, add “https://” at the beginning so it becomes https://www.exampledomain.com and try to access the website, if you see a grey/green padlock like this, congrats, you do have an SSL certificate installed and functioning properly. If not, not to worry as you will surely get it by the end of this very short and sweet tutorial. 😉
How to get a free SSL certificate for your website?
We at SiteCountry are happy to provide all of your hosted sites including subdomains, addon domains and parked domains with Free SSLs issued by Let’s Encrypt and ZeroSSL via our all new lightweight control panel.
Generally, our servers will automatically run the SSL Certificates installation once a day or when the domain is added to your hosting account.
In case you happen to face an issue with the SSL for your website, you can simply install it manually via the free SSL tool in our control panel.
- Login to your control panel.
- Navigate to ‘SSL Certificates’.

- Select “Get automatic certificate from ACME Provider”.
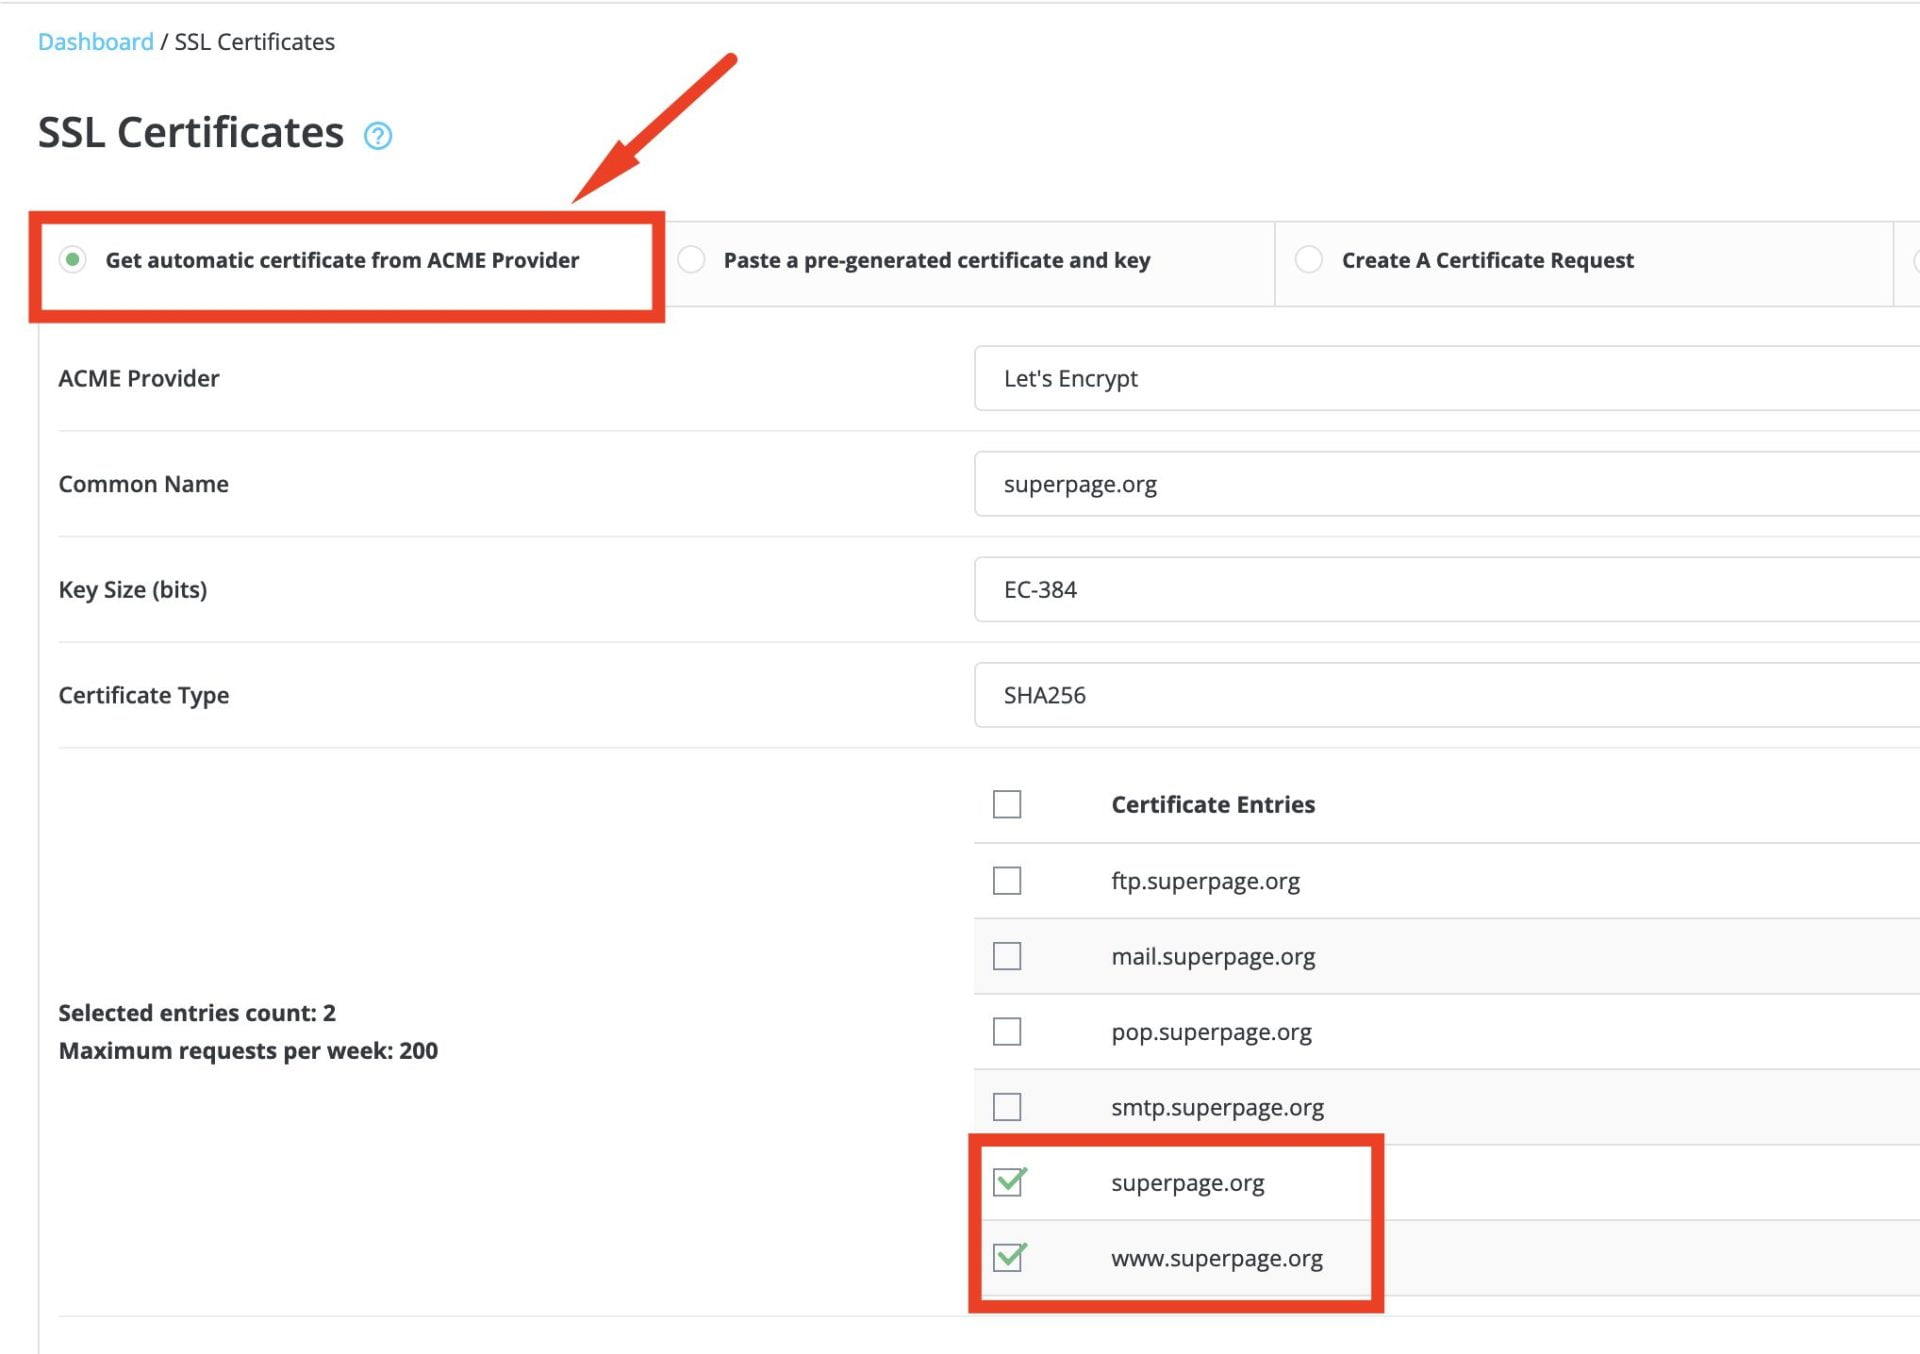
- Choose the domain and the subdomains by selecting the checkboxes (I’m choosing www and the main domain in this case).
- Click ‘Save’ in the bottom right corner to begin the installation.
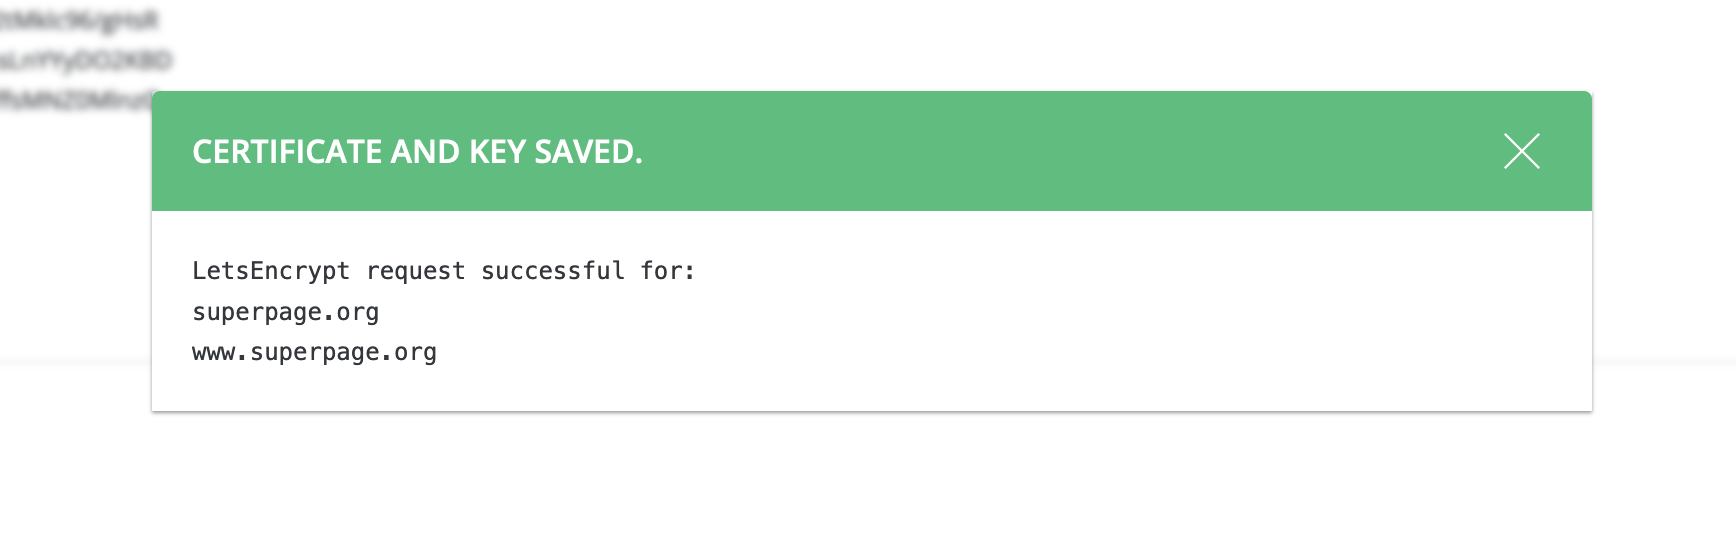
The message shown in the above picture signifies that the SSL installation attempt was successful and the SSL certificate for your chosen domains have been issued and saved and is ready to be used.
You can now access your site via https:// to see it for yourself!
Common Issues with SSL Installation
There are a few common issues that you might face while generating a free SSL Certificate using this tool, let’s take a look at them.
- “No domains pointing to this server to generate the certificate for.”
![[Error] No domains pointing to this server to generate the certificate for.](https://www.sitecountry.com/kb/wp-content/uploads/2022/04/ssl-certificates-common-errors-1.png)
As suggested by the error message, this error usually appears when the DNS propagation isn’t complete or the DNS settings for your domains are not properly configured to point to your hosting server, if you are sure that the DNS and Name servers are properly set, you should patiently wait for the DNS to propagate before trying again.
In case you are still not able to generate the SSL certificate, please contact our customer support team to take a look into it for you. 😊
Priyansh is the customer success and technical support head for SiteCountry. With a passion for great customer experience, he has garnered knowledge and experience related to web hosting and cloud computing that brings out in his work. He likes travelling and watching movies in his free time.